Creating a project using Windows Authentication for SQL Server
This article serves as a guide to create a Bizagi project using Windows Authentication for the SQL Server instance.
If you use SQL Server Authentication, refer to Create a new project.
Prerequisites
To create a Bizagi project in a SQL Sever database using Windows Authentication, you will need to make sure that first the Windows account appointed to create the project, is configured as a Login in your SQL Server instance.
Make sure that it is granted with the adequate permissions: GRANT CONNECT, GRANT BACKUP DATABASE, and GRANT CREATE DATABASE.

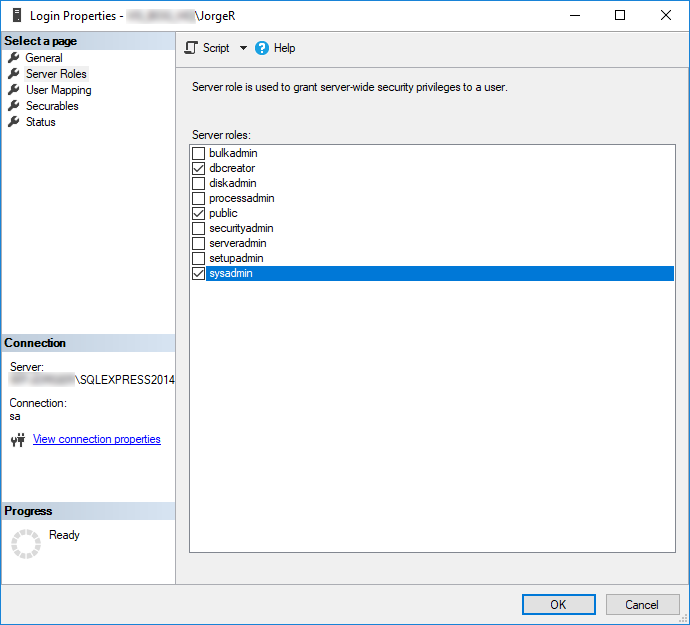
Furthermore, the user must have the server roles dbcreator, public and sysdamin.
For more information about how to grant these permissions, please refer SQL Server official documentation.
Before you start
Before you proceed with Bizagi Studio, modify the account employed at the Bizagi Standard Server Operation Service's configuration.
Complete the following steps to change the default account (appointed during installation).
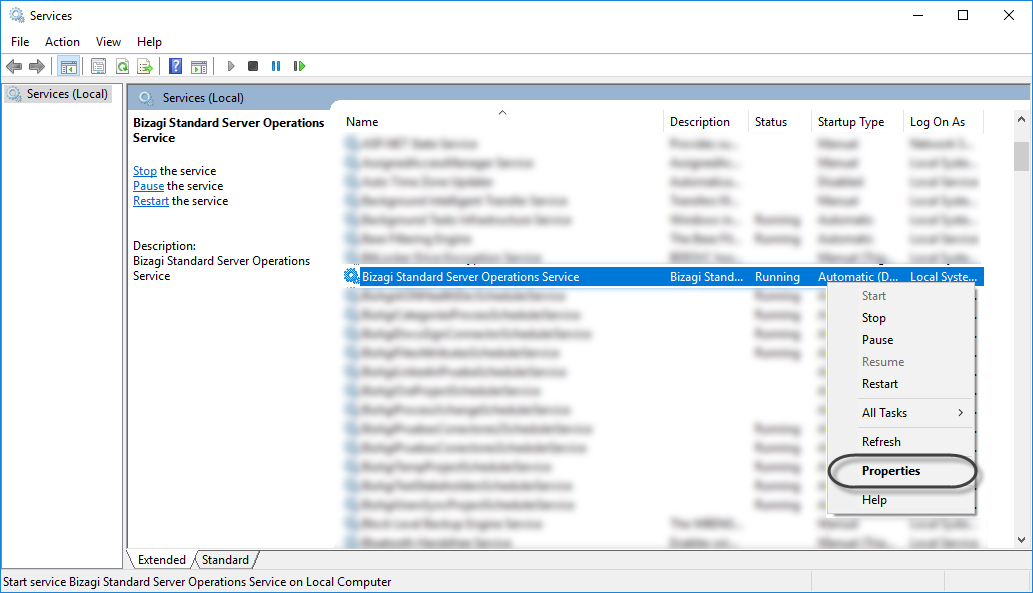
- Open Windows Services console by using Run option and typing services.msc
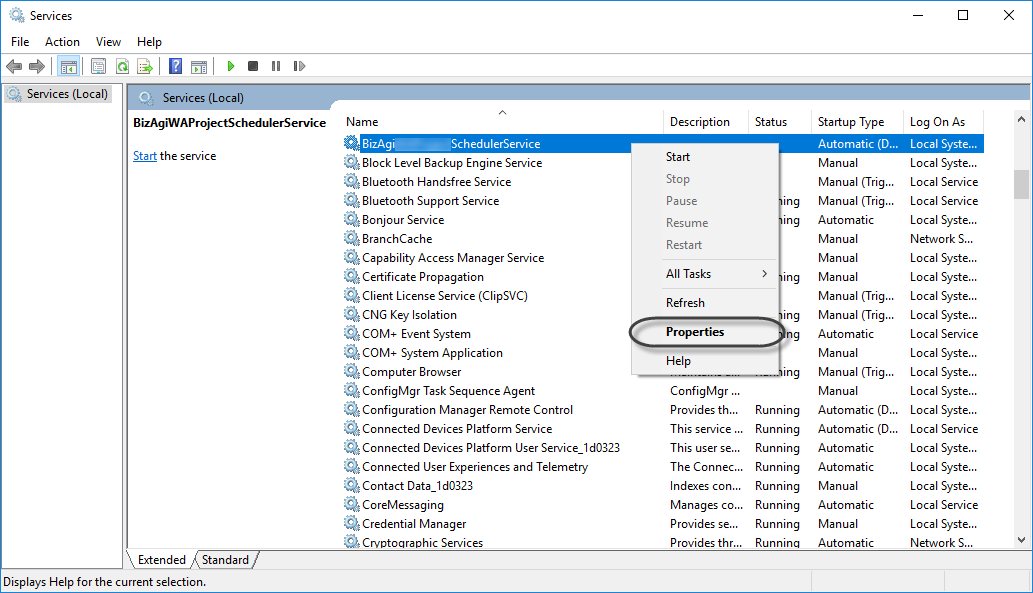
- Locate Bizagi Standard Server Operation Service and right-click it. Then, select Properties.
- Go to Log On tab.
Select the This account option and type the Windows account and password of the person who is going to create the project.
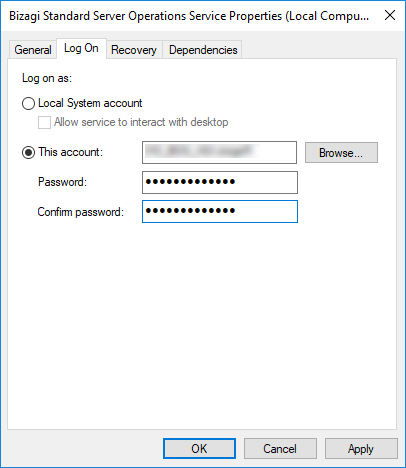
Click OK to apply the changes.
- Restart the service in order to enable the changes

What you need to do
To create a project and make sure all project components are configured adequately to support Windows authentication-based connectivity to the database, follow these steps:
1. Creating the project.
At this point you can create new projects in Bizagi that use Windows authentication to connect to the database.
2. Configuring the Scheduler service.
By default, Bizagi creates a Windows Service called BizAgi[Project_Name]SchedulerService using SYSTEM as the account to log on. Given that this account does not have access to your database, change the default account.
3. Configuring the IIS application pool.
If you want to use IIS Express, this step is not necessary. Otherwise, change the default account set for the application pool of your Project's Work Portal.
Procedure
1. Creating the project
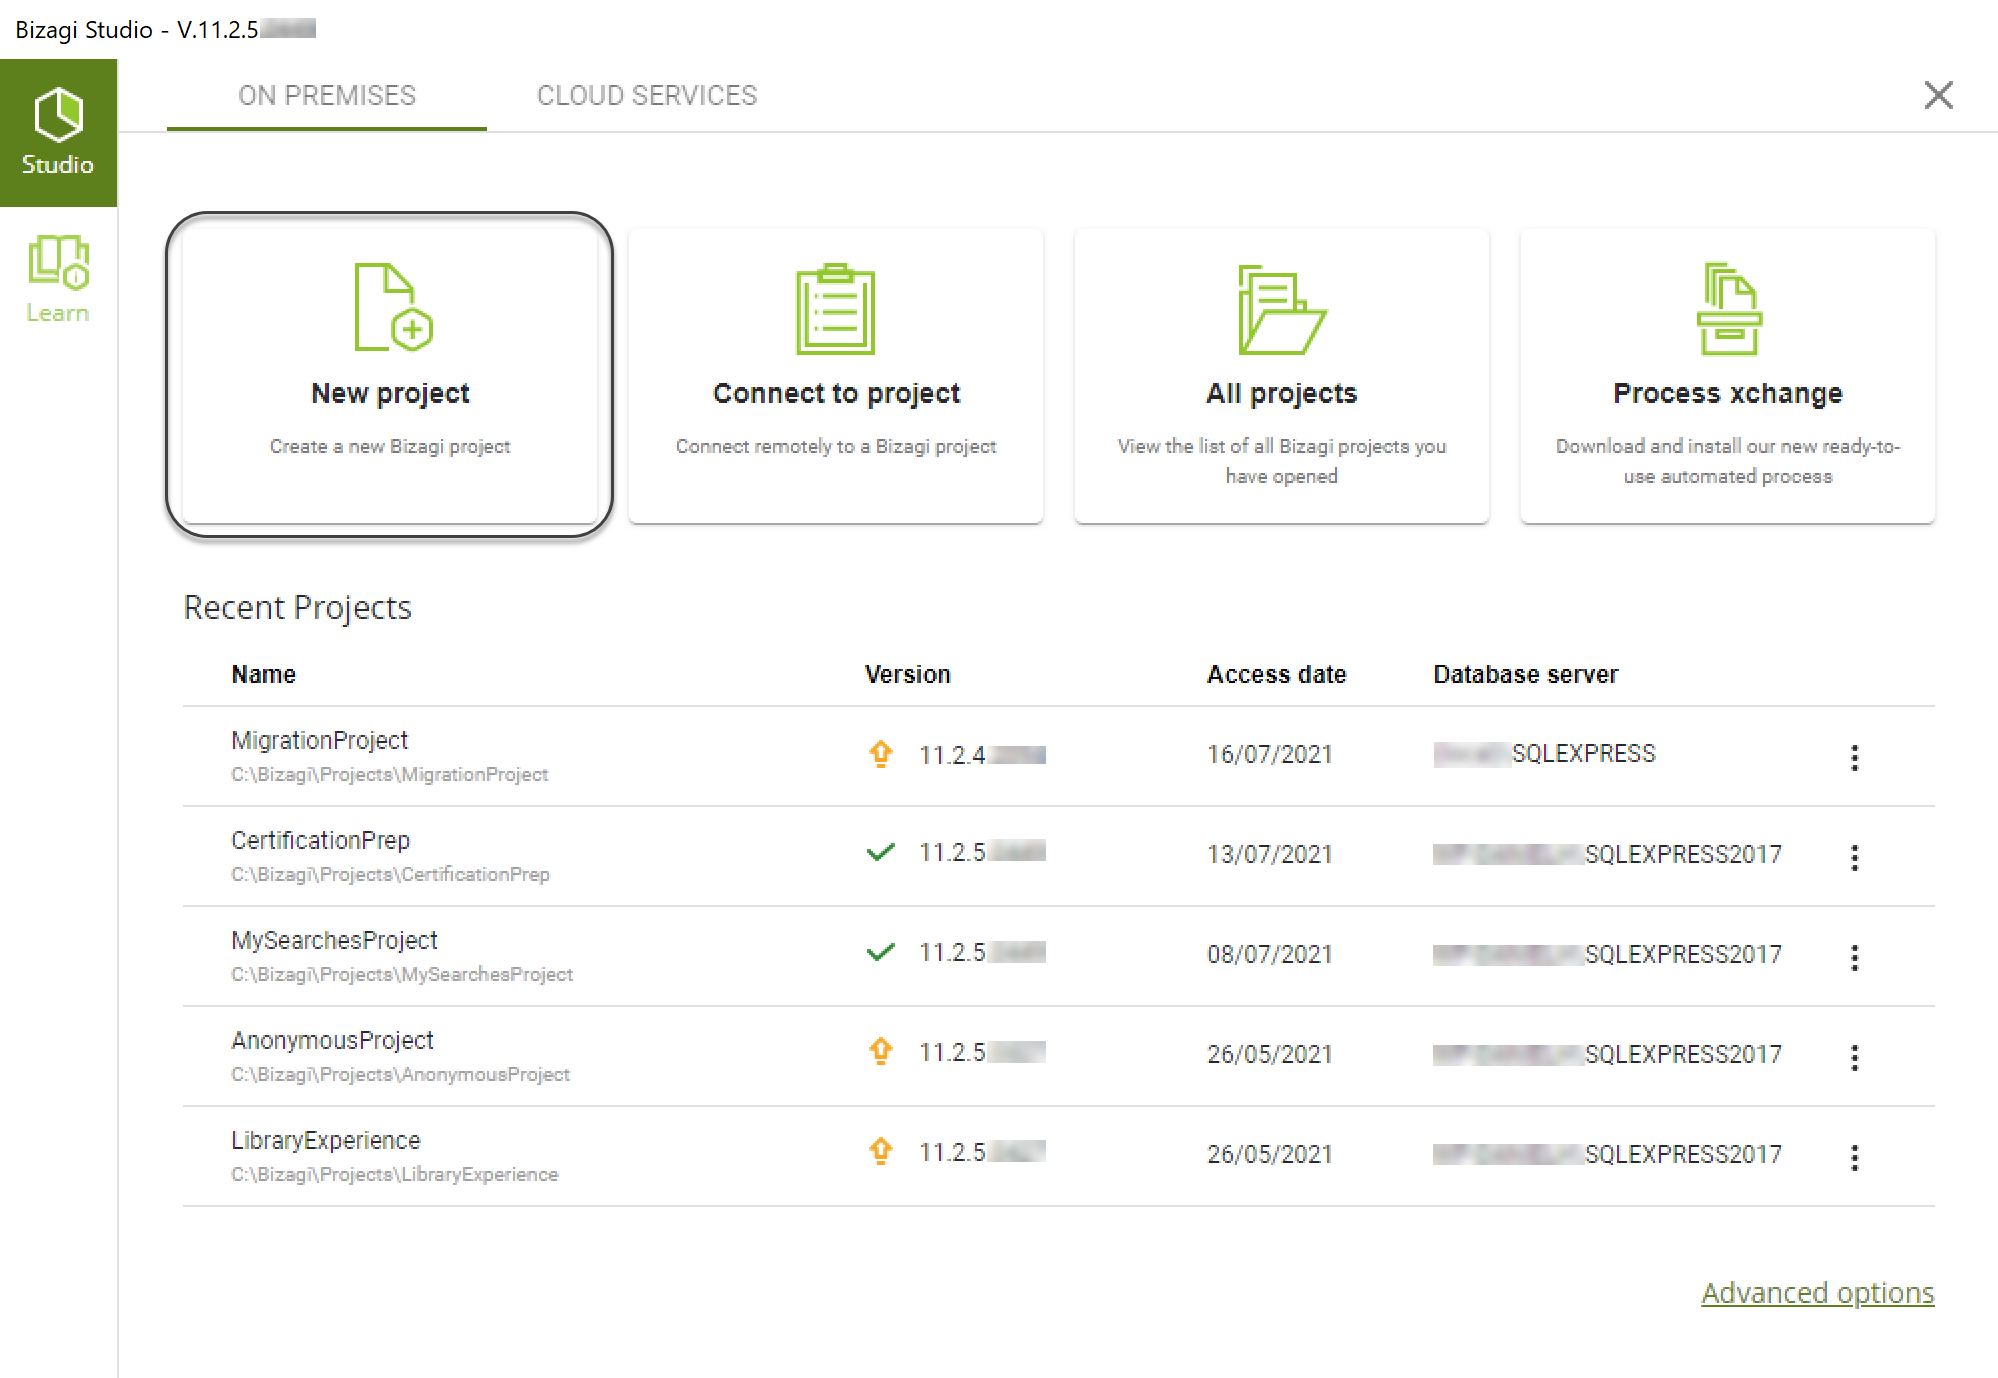
1.1. Use the New project option in Bizagi.
You can click directly in the New shortcut, right when Bizagi Studio is opened:
Note:
Keep in mind that in order to create a project, your account needs to belong to both the local Bizagi and the Administrators group (where Bizagi Studio is installed).In order to check if your user is added to both groups, follow these steps:
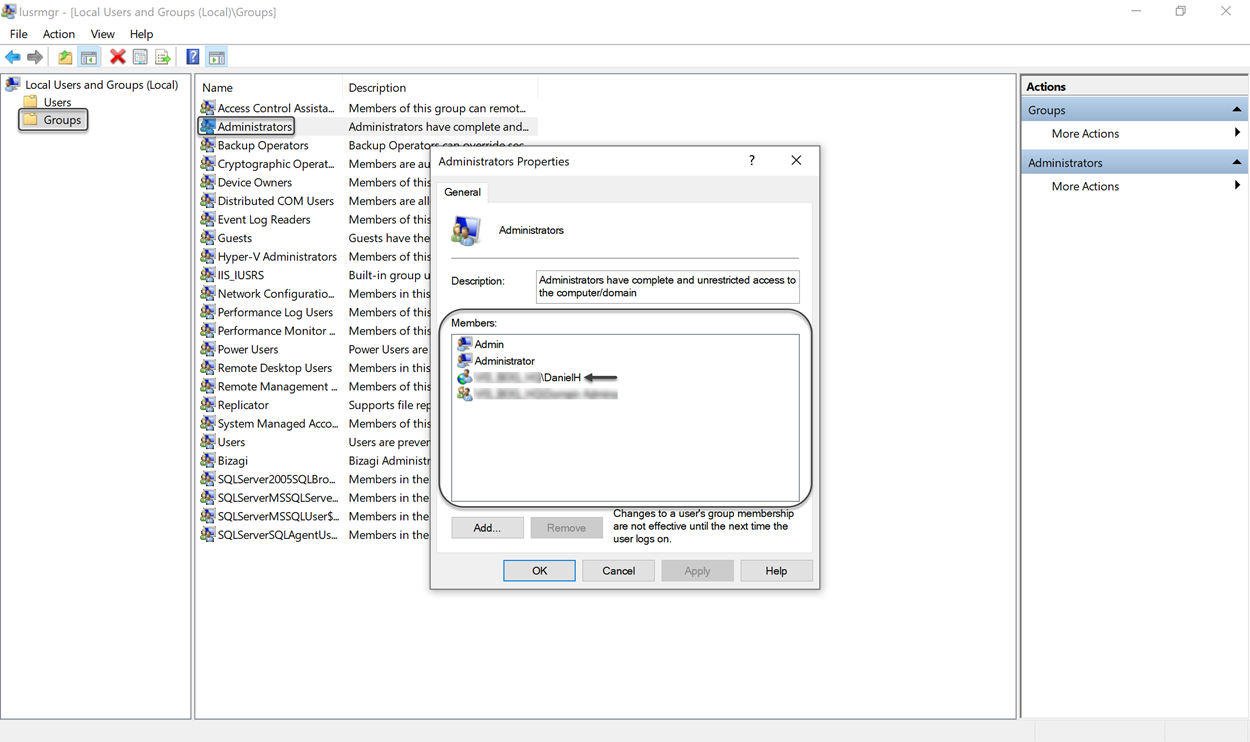
- open the Edit Local Users and Groups utility on Windows.
- Click the Groups option.
- Find the Administrators Group and make sure your user is included. If it is not, add it by clicking the Add option and entering your user (as it is shown in the image below).
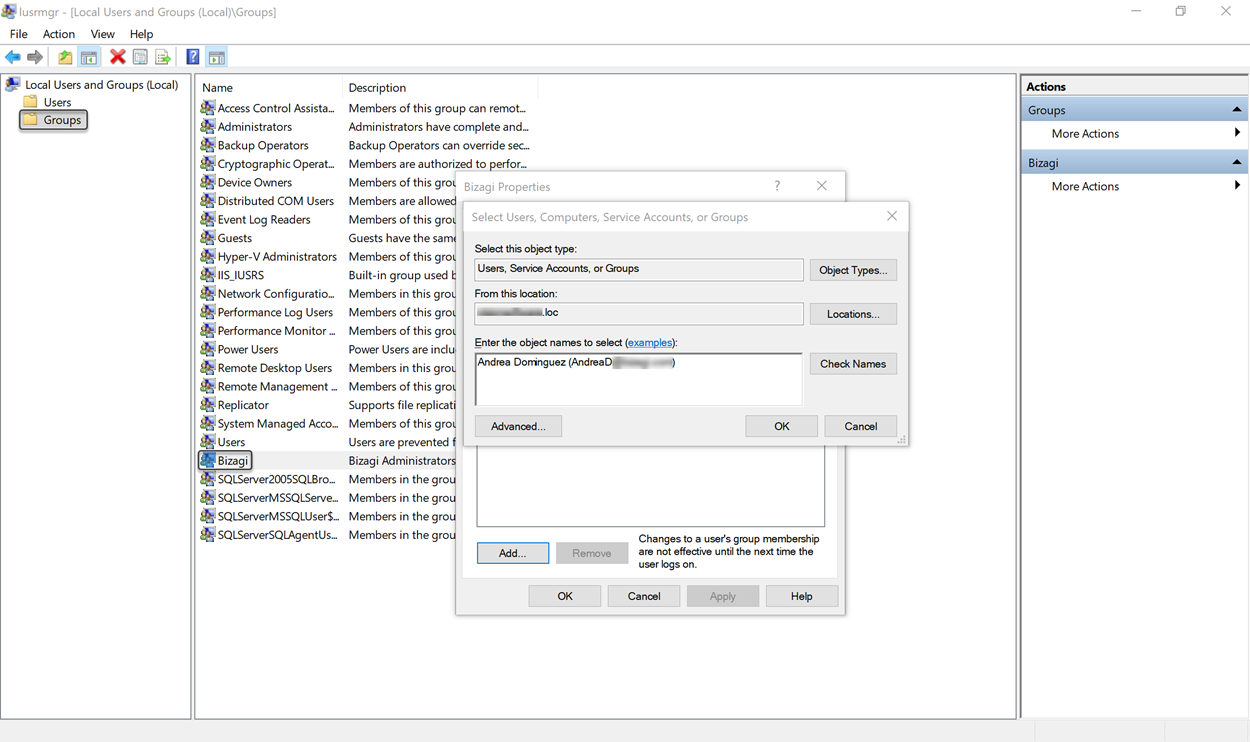
- Find the Bizagi Group and make sure that your user is included. If it is not, add it by clicking on the Add option and entering your user (as shown in the image below).
If your account does not have such rights, you will be prompted to enter authorized credentials:

1.2. Enter details of your project.
Make sure you give your project a name and define its location.
Then, mark the Advanced database configuration checkbox:
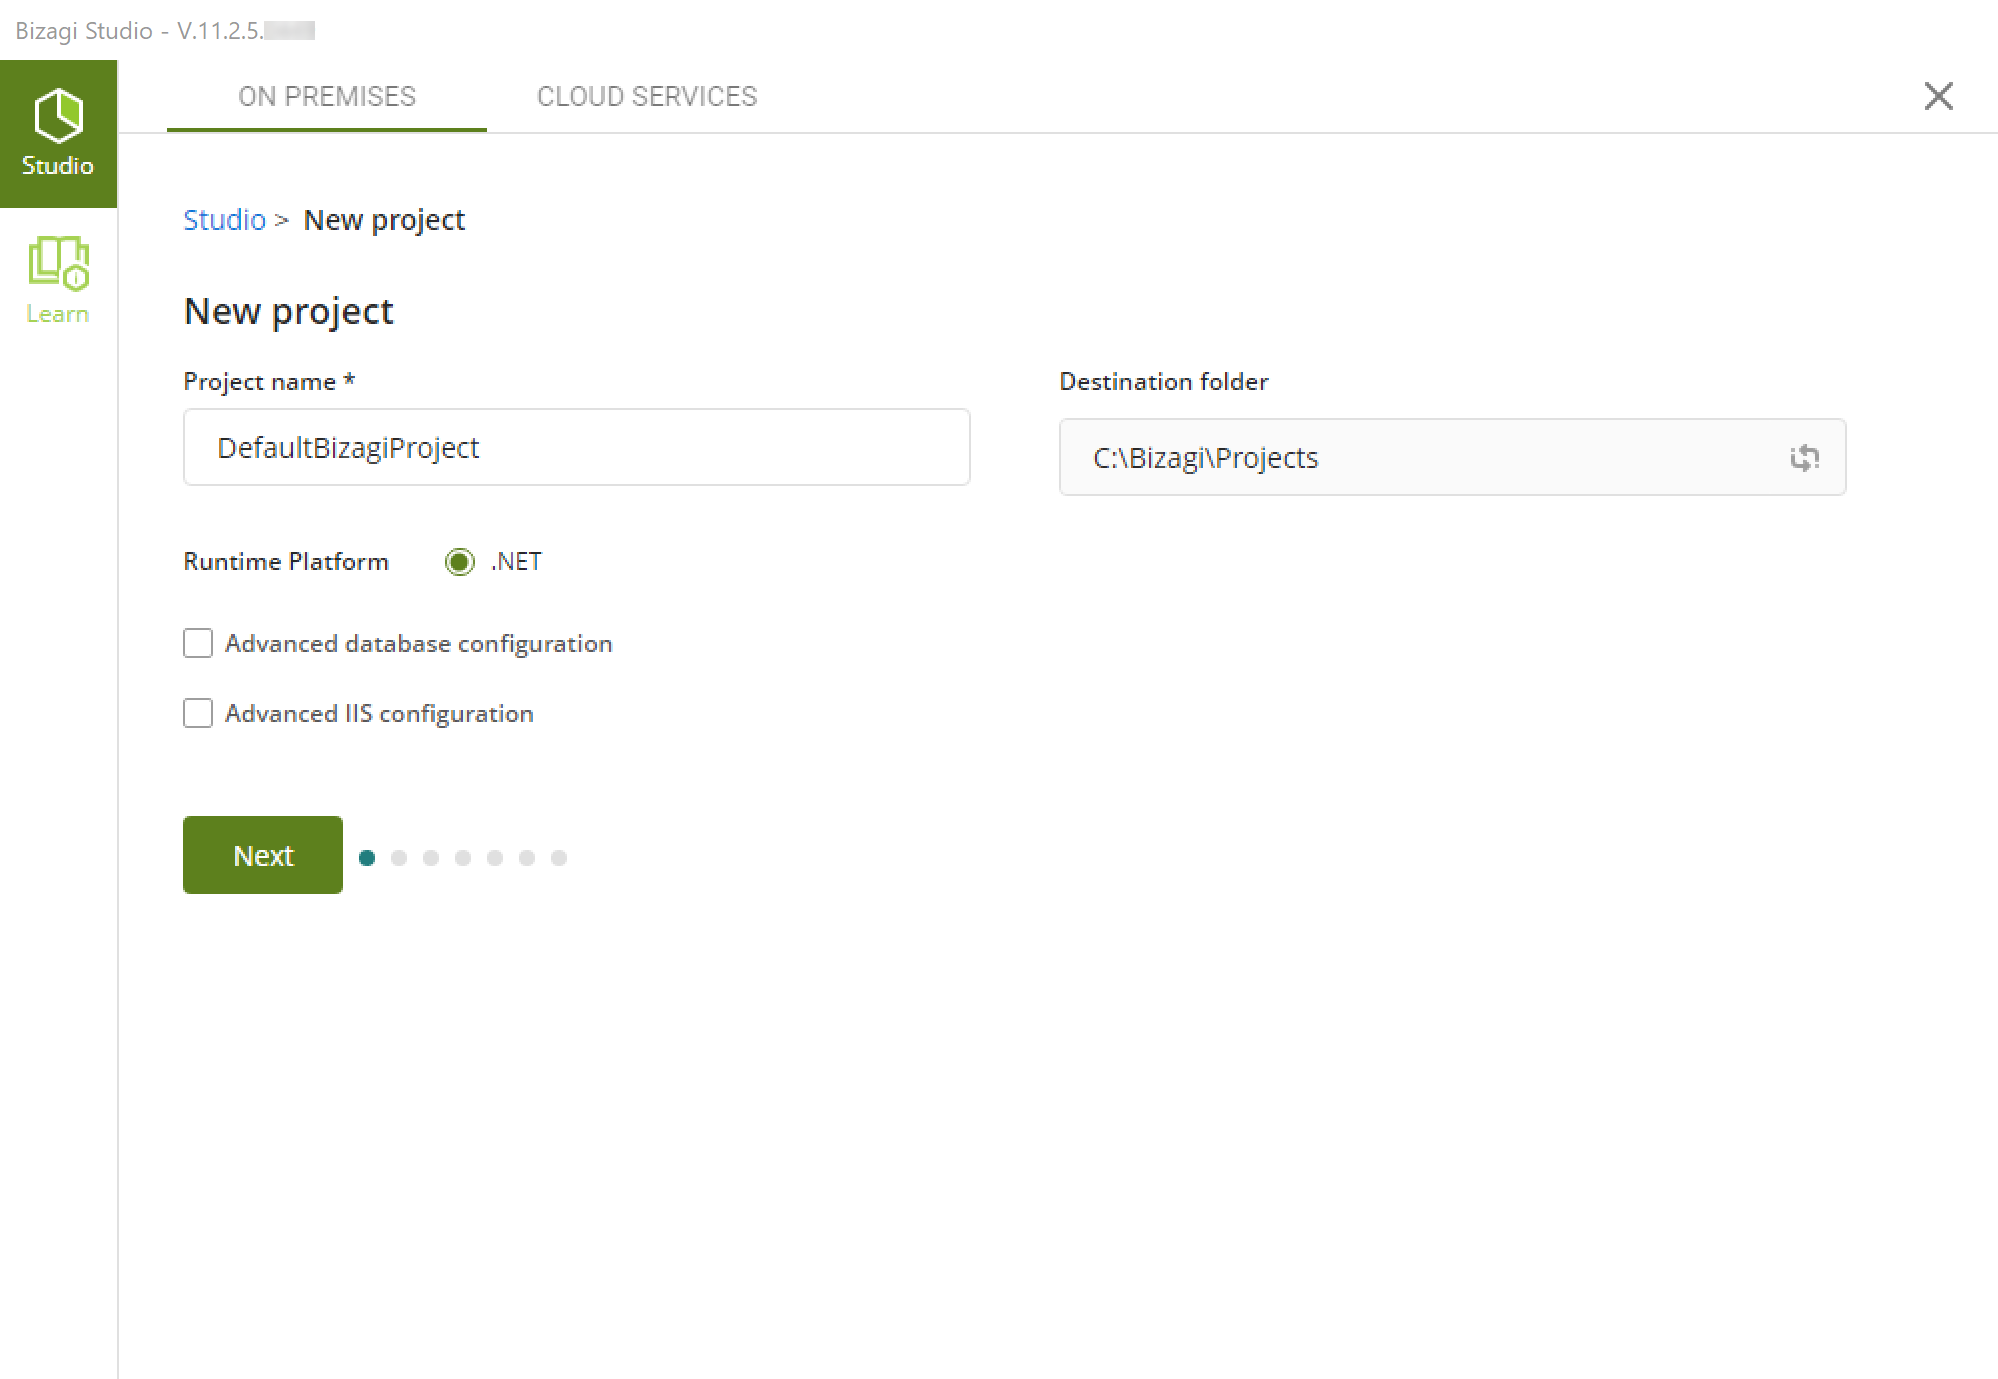
Click Next.
1.3. Configure Bizagi database.
Select the Windows Authentication option.
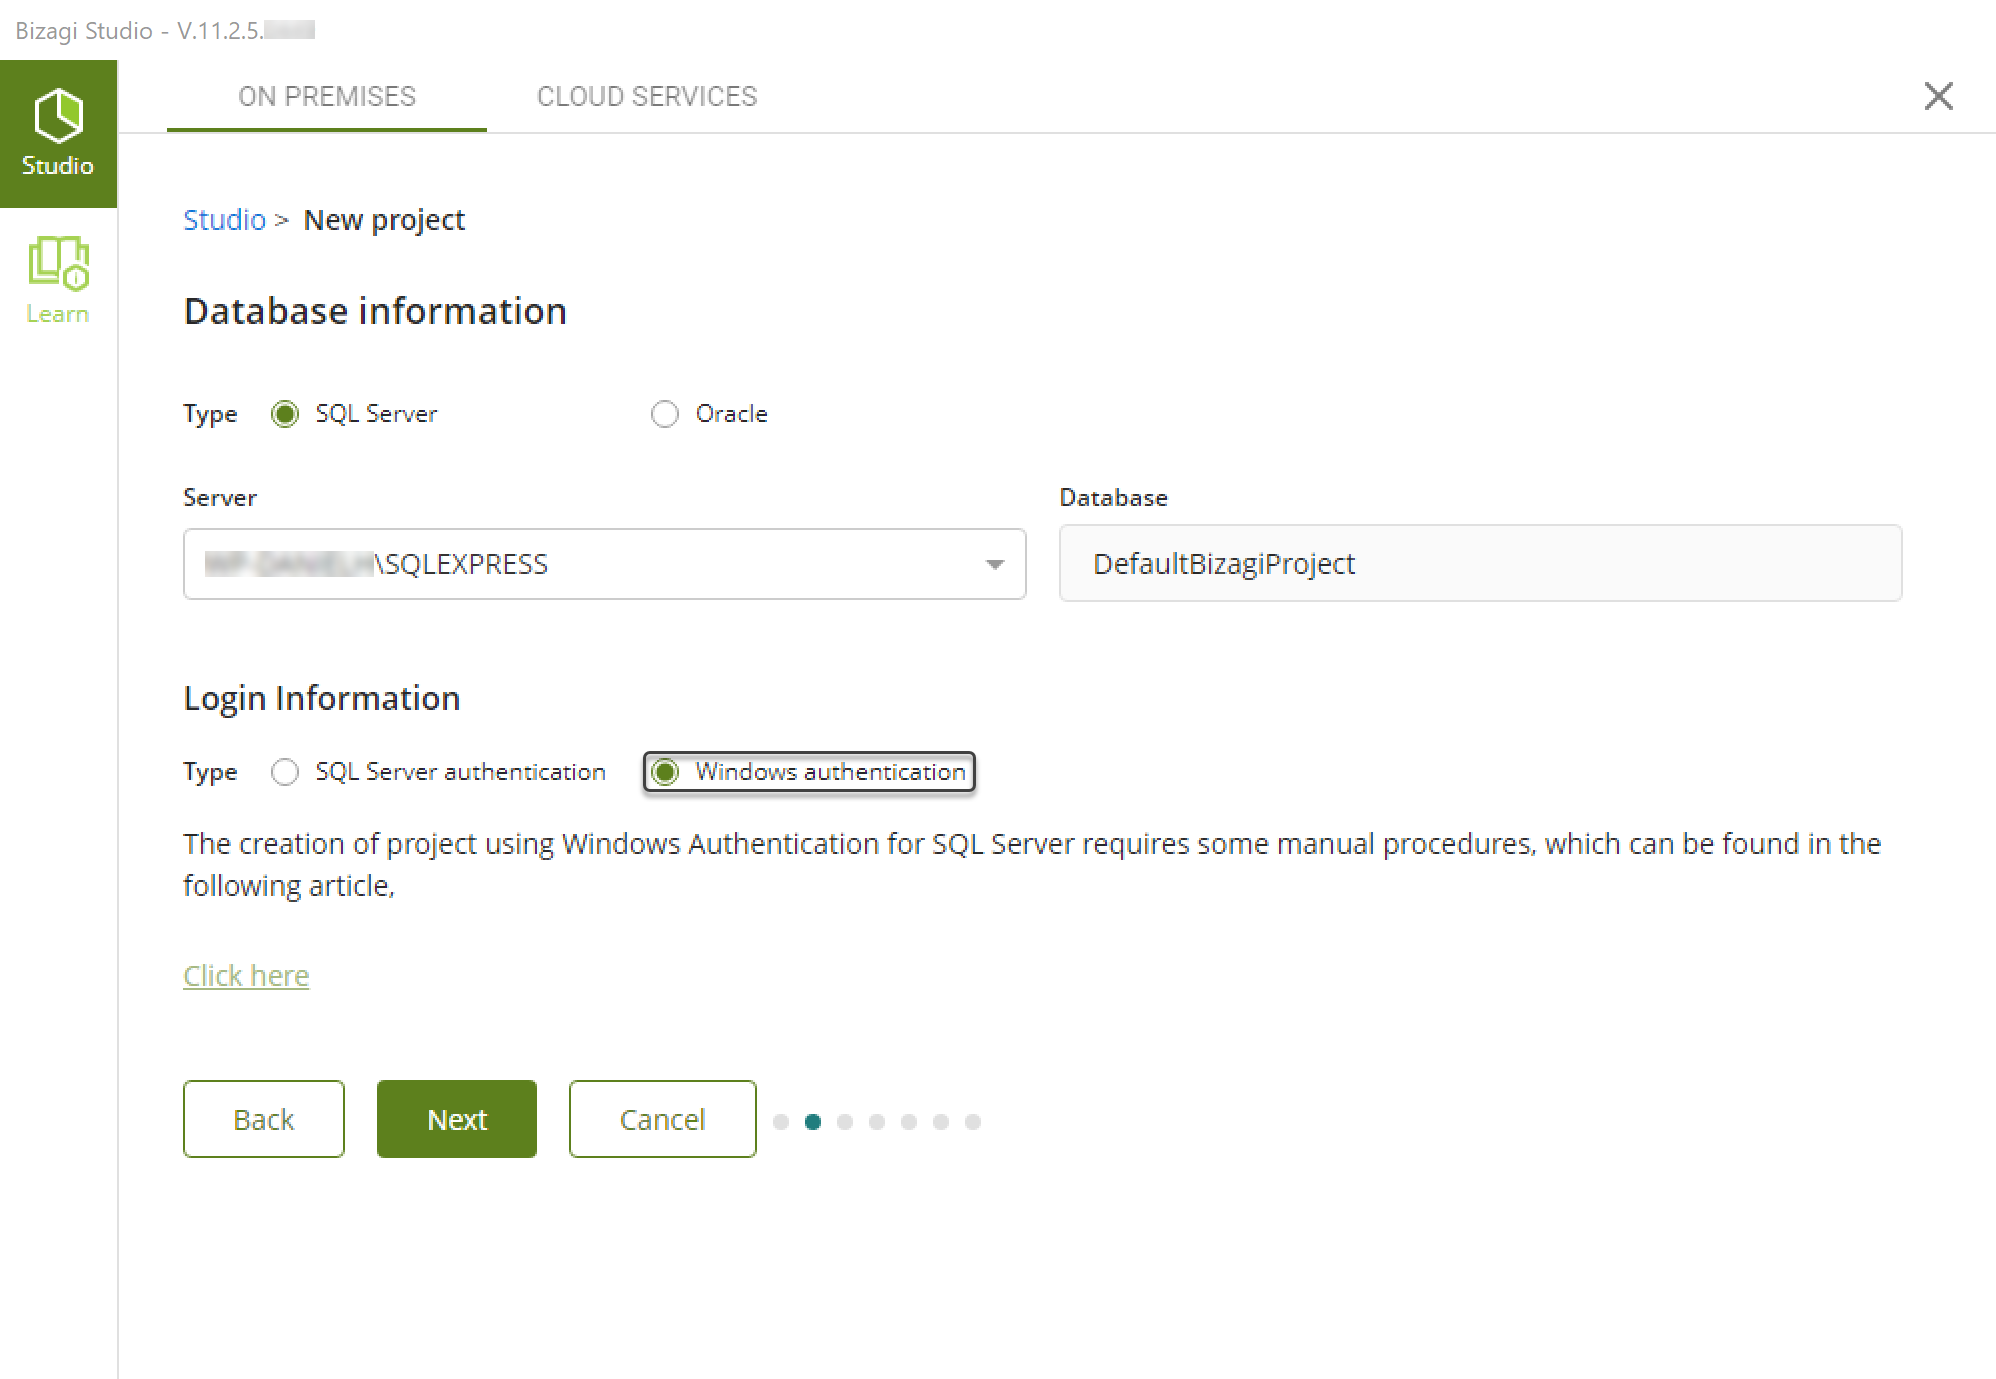
Click Next.
Bizagi will start to create the project. This may take a few minutes:

Once the project has been created, Bizagi Studio prompts you about perform some manual procedures to make sure Bizagi behaves normally. The link displayed in the information message redirects to this article.
Click OK and Bizagi Studio will automatically open the project and you can proceed with the next steps.

2. Configuring the Scheduler service
2.1. Open Windows Services console as mentioned before.
2.2. Locate and right-click the Service called BizAgi[Project_Name]SchedulerService. Then, select Properties.
2.3. Go to Log On tab.
Select This account option and type the Windows account and password used to create the project.
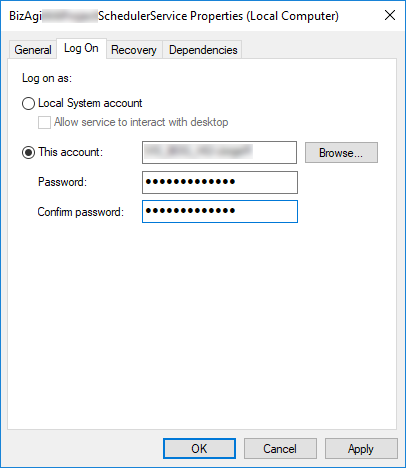
Click OK to apply the changes.
2.4. Start or Restart the service in order to enable the changes

3. Configuring the IIS application pool
- Reconfigure the Work Portal by using the Internet Information Services (IIS) Manager.
To do this, you can use the Run option. Type: inetmgr

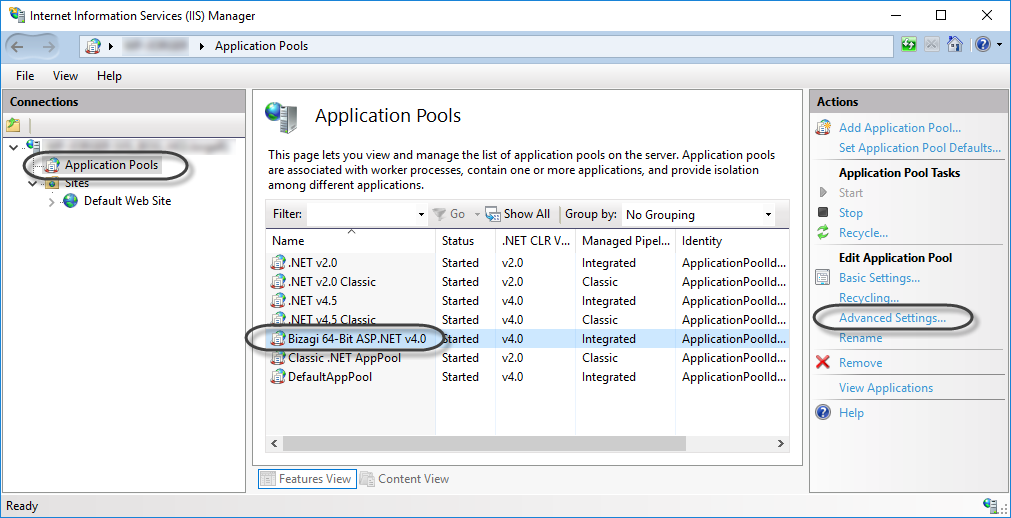
- Select Application Pools and select Bizagi X-Bit ASP.NET v4.0. Then, click Advanced Settings.
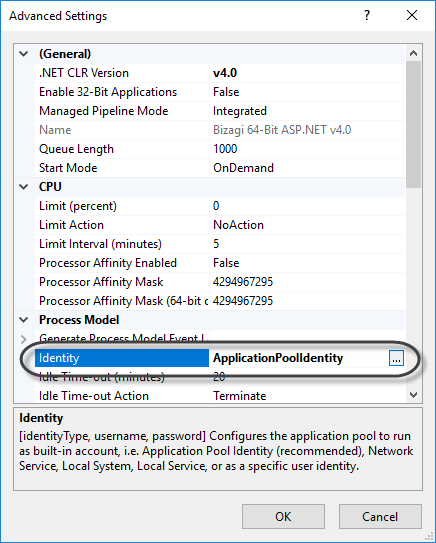
- Locate Identity and edit its value by clicking the three dot button.
- Select Custom account and click Set.

- Type the Windows account and password used to create the project.

Finally, restart your IIS.
At this point, you are ready to get started automating your processes.
Considerations
Take into account the following considerations when using Bizagi Studio with Windows Authentication as SQL Server Authentication mode:
- If your account password changes anytime, you must update it following the last two steps.
- You cannot create more than one project using different Windows accounts.